

It was the day. The day to wire in the Z-Wave devices on the switches and test that the openHAB software was able control the switches. The tests had been done. And this was the real deal. The devices had been purchased. The instructions had been revised several times. The circuitry had been discussed with the electricians several times. All the necessary doubts had been cleared. The softwares had been tried and tested. And yet when it came to the day – Of Course, we had problems. But glad to say, this story had a good ending and lessons learnt from all the problems we faced. Here’s a visual capture of the day.
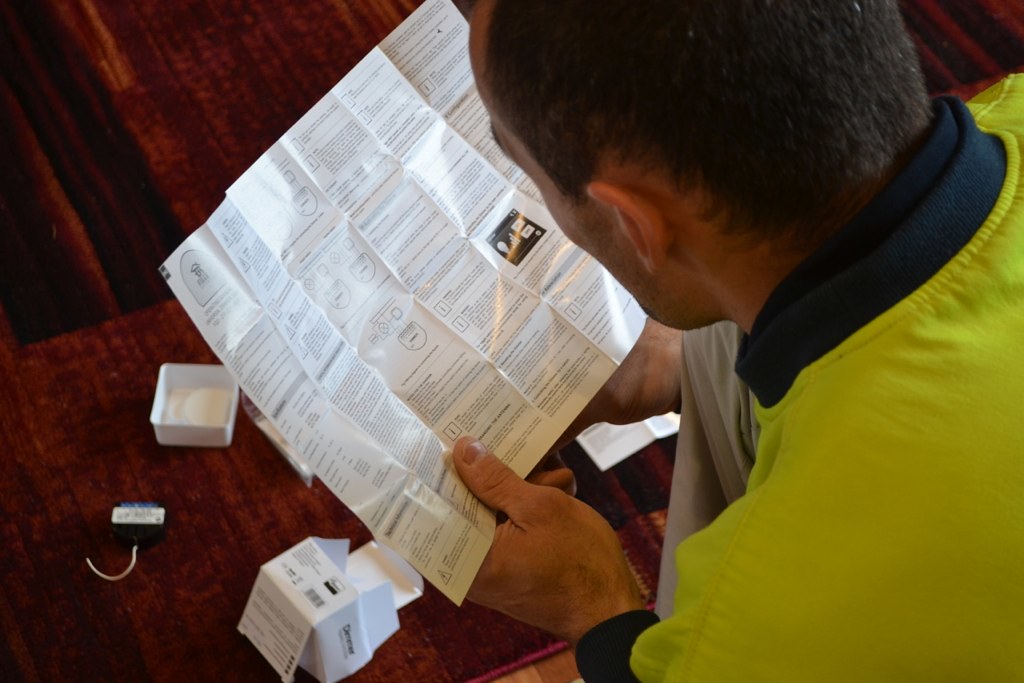
Go with the manual not instincts. The electricians may have been in their line of work for several years – but Z-Wave devices or any other home automation devices are relatively new. Do not allow them to go with their “instinct” – no matter how experienced they may be. We wasted a lot of time because the circuit diagram apparently was not clear enough and the electricians decided to go with their gut feeling rather than trying to learn a bit more.
Lesson #1: Go with the manual not instincts.
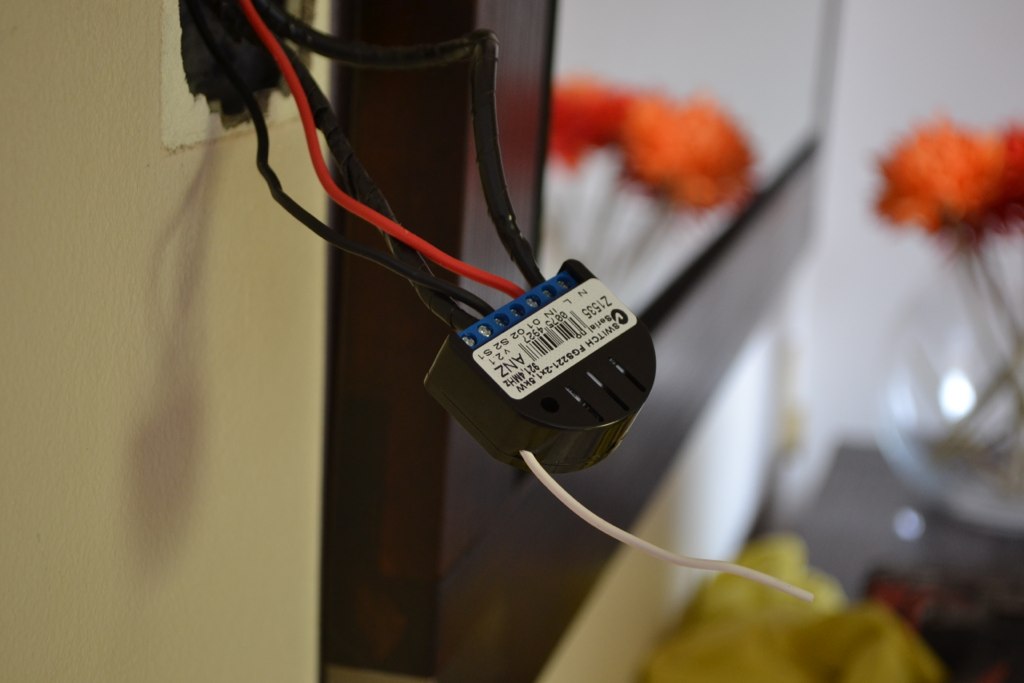
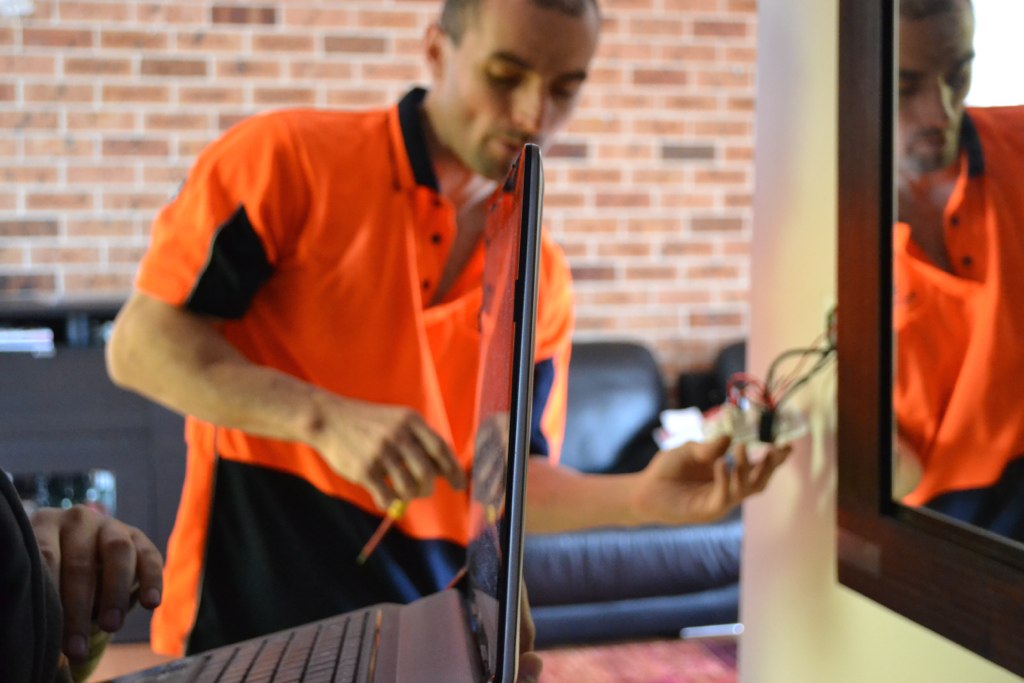
And that’s how the Z-Wave devices are wired in. That’s about all I can say!
The Clipsal switches connected to the Z-Wave devices. Then a quick test to check they “talk” to the home controller device – the Aeotec Z-Stick S2.
Another problem we faced was during the wiring of 2 way switches using Toggle push button instead of momentary.
Lesson #2: For 2 way switches use Momentary push buttons not Toggle.
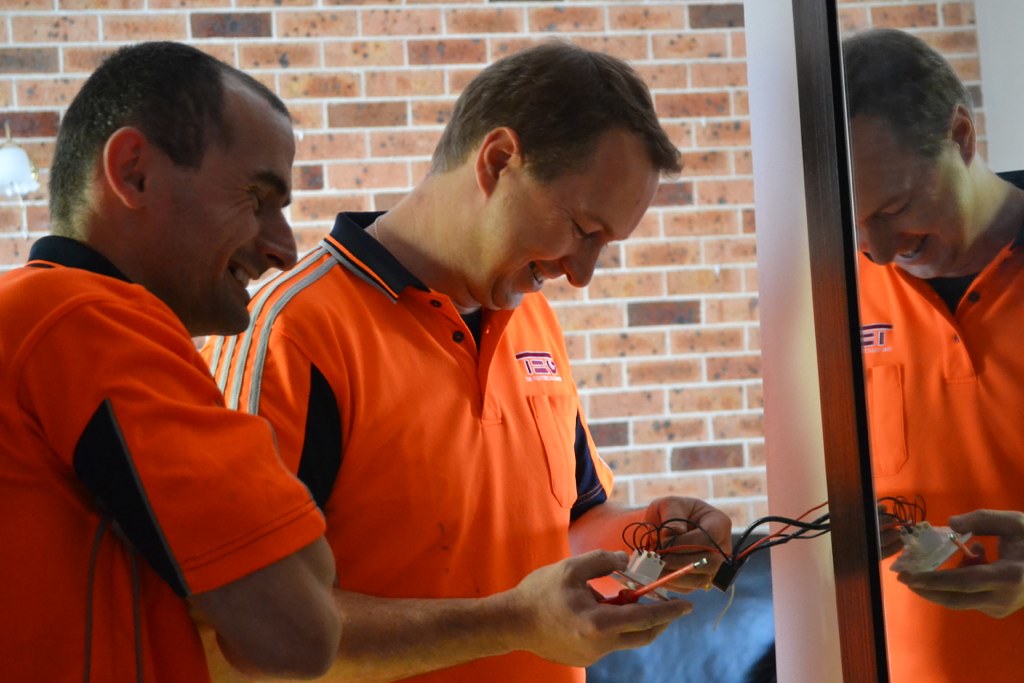
Honestly, we did need a bit of light moment. We were all a bit nervous and a bit of humour was most welcome!
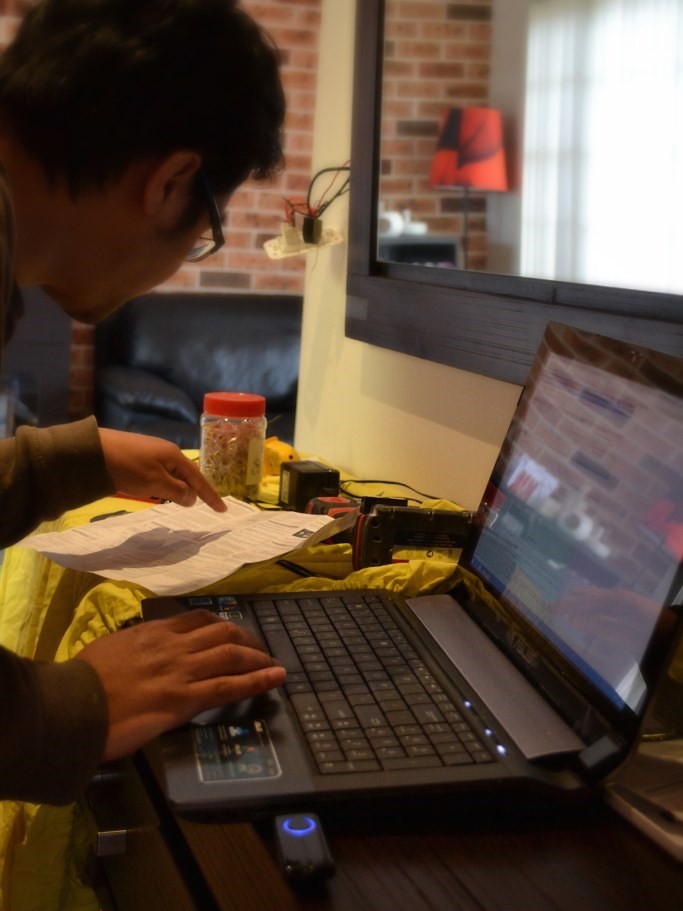
SS getting his grey cells working.
And may I add, that in the middle of all this, SS’s OS was auto updated, he decide to restart as prompted and then his machine would not work past the login screen. Talk about bad timing!!! We frantically & unsuccessfully tried to get everything setup on my MAC. Finally, we had to resort to borrowing our brother’s computer to keep on progressing. Phew!!
Lesson #3: That OS update can wait.
Set the wiring. Test via openHAB. Repeat.
This went on for ages! The delay was because of a medley of problems listed above.
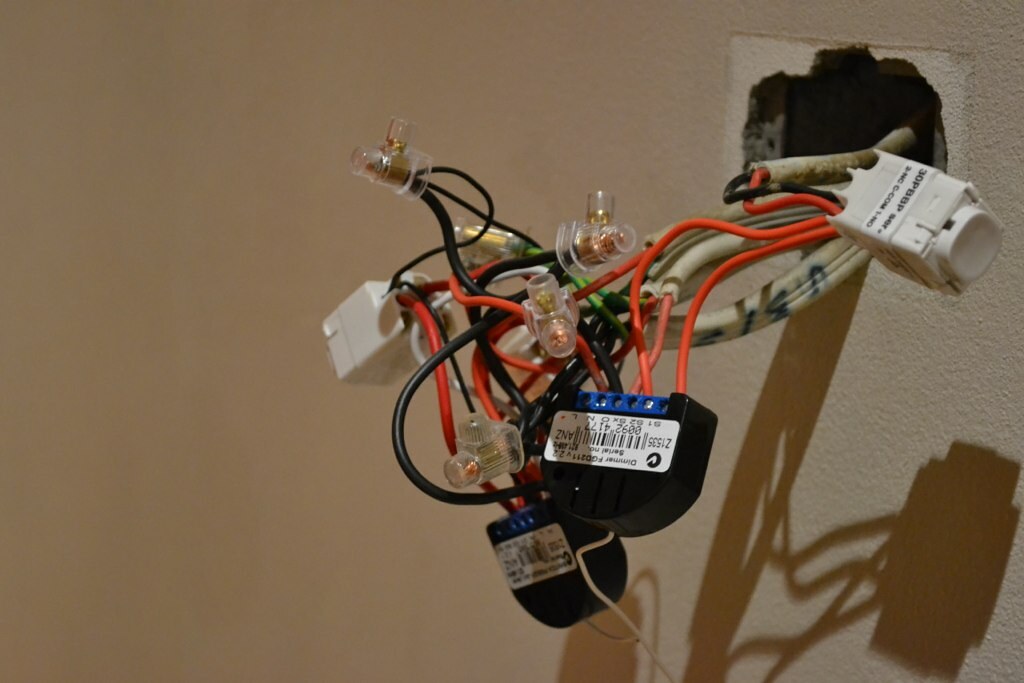
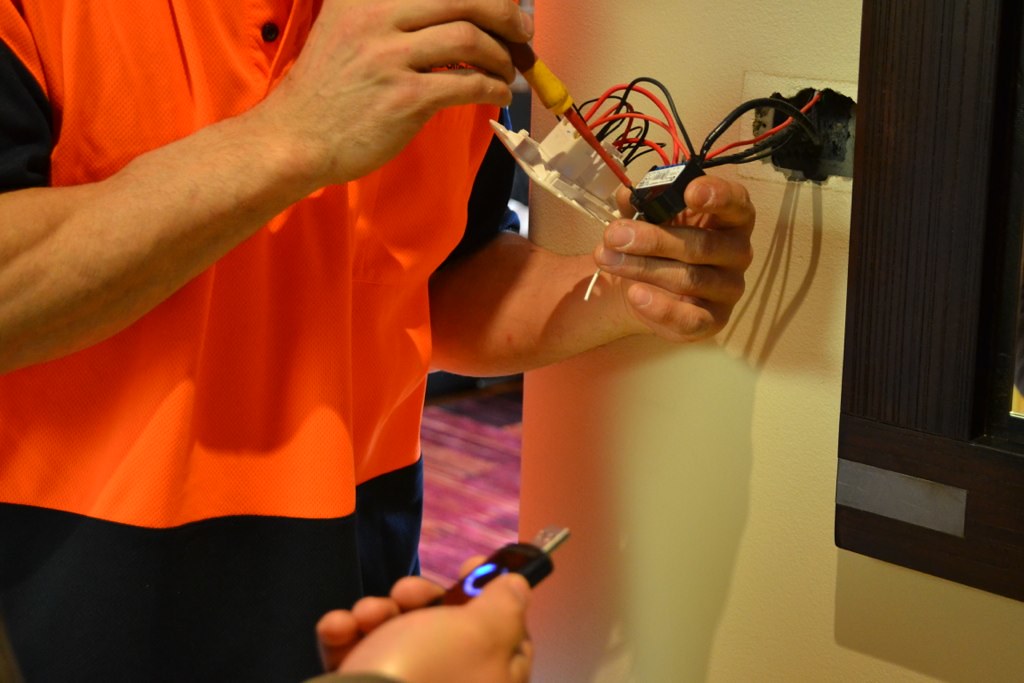
This was what one of the switches looked like on the inside – a 2 way dimmer switch for the hallway and two switches for the outside. After all the complex wiring was done, we had a simple BIG problem – How the hell do we fit all that into the small wall socket!!
Lesson #4: Think things through before beginning the project.

But these guys made it happen! I was glad not to have the bulging mounting plates.

The wall plate neatly hides all the chaos inside.

Certificate of Compliance for the electrical work – A must have. This will be our saviour – if in case we run into some serious electrical problem with the Z-Wave devices.
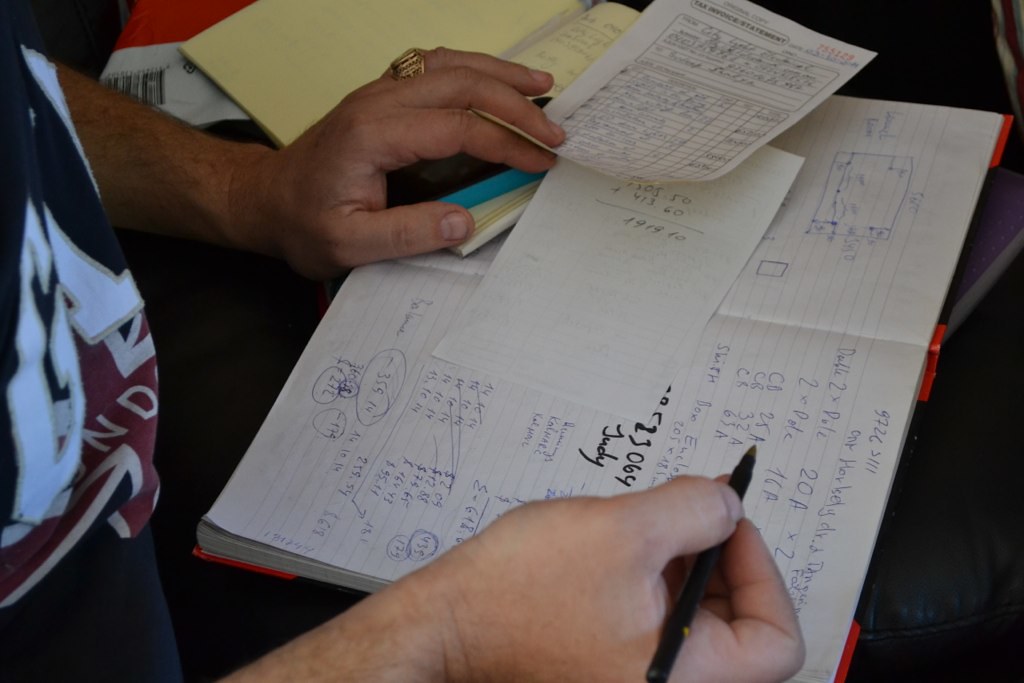
The number crunching at the end – which I must say, I was not too disappointed about. A project of this scale is said to normally cost around $25K to $30k. For us because the project was all lead by SS, and the electrical guys basically only did the wiring, it cost us just under $3K. Not bad eh!
Lesson #5: Sometimes, it is possible to achieve big things with small budget 🙂
And at the end of that long day, I was saying “All Lights Off” to turn off all the house lights.
Our brother still does not understand why we need to use our mobile phones or voice commands to control the switches. And he also does not understand our excitement. So over to you…Does the idea of home automation excite you? Or is it just our geeky nature that is sending us flying over the moon over our little big project? Would love to hear your thoughts.

It excites me! Maybe it is the geekiness in me or pure laziness 😀
http://www.thefunkybeans.com
LikeLiked by 1 person
Watch out for more 😉
LikeLike
I love reading your posts in general and more specific about your home automation project.
I was wondering if you will consider it to write a post for my blog http://www.practicalsmarthomes.com.
If you are willing, can you write something about you project from the start to the finish with the emphases on the practical side.
Here are some pointers, but you can put in anything you consider worth while.
You mentioned in this post, “to think things through”, can you give examples about what to keep in mind? You also write that you basically “do it yourself” and that was why it was affordable. In hindsight will you still say its a good idea? Can you mention other gotchas or watch outs.
I don’t mind if you put in links that link back to your blog and to give you credit.
LikeLiked by 1 person
Thanks a ton for reading! And it’s so nice of you to offer 🙂
I just went through your blog and there are tons of interesting things I am going to be following up on.
But with all due respect, I don’t think I am at a stage where I can write a good & resourceful enough post for your site. May be in future but definitely not right away. Plus my tone of writing is veeery casual & I basically speak my mind out when preparing a post.
Having said that, I am more than happy for you to take anything useful from this blog (text or photos or videos) and interpret in your own words for your site – just let me know before you do? Or reblog if you think any post is worthy of it. I would love a ping back too 🙂
To answer your questions:
Think things through:
When we decided to wire in all the z-waves and the switches, we/electricians didn’t think whether we would be able to fit all that into the existing wall socket. We were left with 2 options to either drill the wall to make a bigger space or use mounting wall brackets.
Also all the Clipsal push buttons were toggle. But we quickly realised that we needed momentary ones for 2 way switches. Never thought of these things before starting the project.
DIY:
The programming side was the only DIY for us – only because SS is a programmer by profession & he “gets” it. I don’t recommend anyone to jump on the DIY bandwagon without doing sufficient research. DIY was a good option for us (& it significantly reduced our costs) but may not be for all.
LikeLiked by 1 person
Thanks a million for your honest reply and your offer that I can use stuff from your post (with your permission of course). Its much more that I even hoped for. I really like your writing style and I think it will bring some light to my bloq, but maybe some other time. Thanks also for the answers on my questions. I’m going to use all off this in a future post.
LikeLiked by 1 person
You are more than welcome! Look out for more, coz we have more things happening 😀
LikeLike
Pingback: 11-14-14 Weekly Photo Challenge: Achievement | The Quotidian Hudson
Pingback: Weekly Photo Challenge-Achievement | WoollyMuses
Reblogged this on emergencyelectrician and commented:
please lets link hope your well
LikeLike
Pingback: Finding Nemo in paper mache | Non perfect writing
Pingback: Finding Nemo in paper mache | Non perfect writing